staples
Gluten-Free Honey Oat Bread
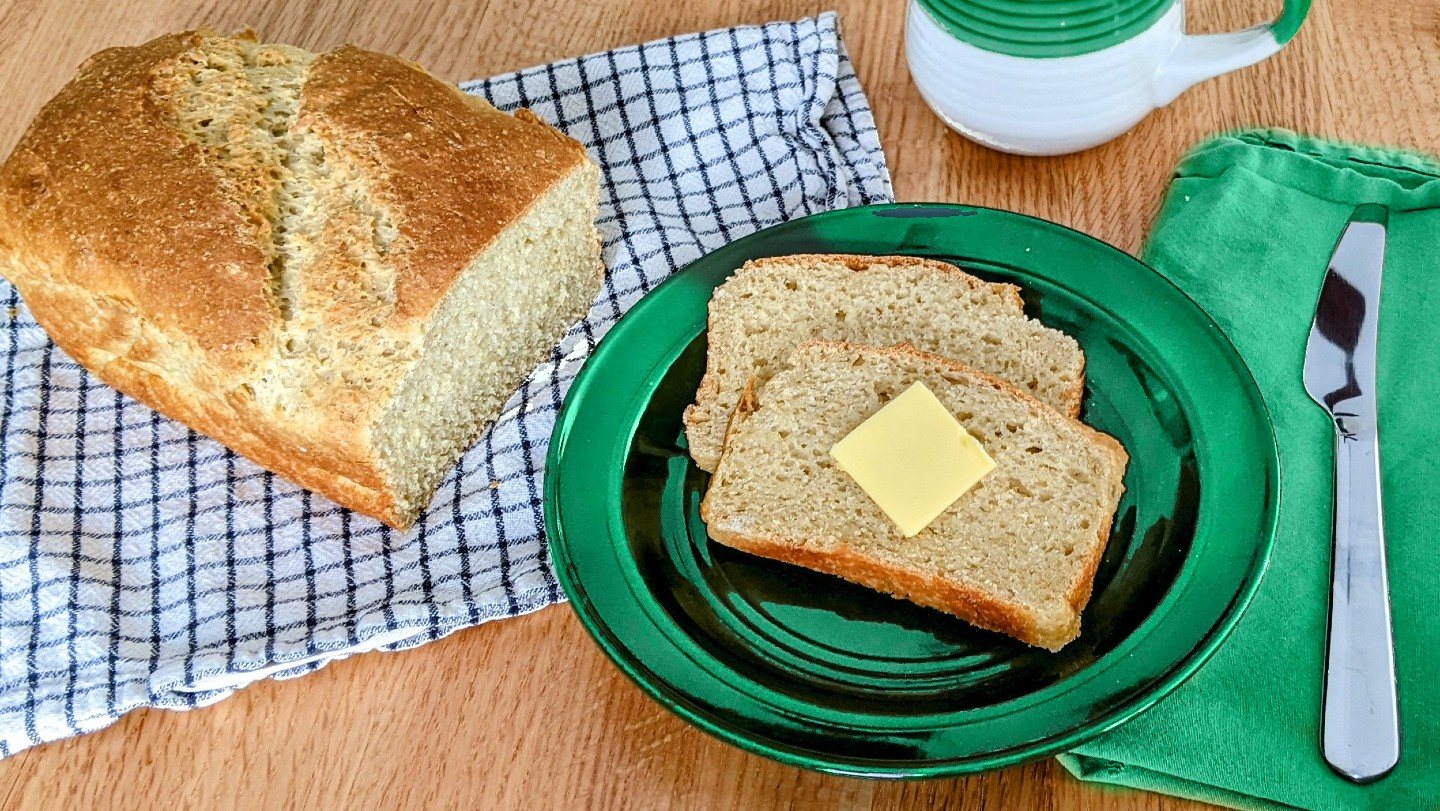
This delicious gluten-free sandwich bread is made with oats and honey. It is soft, sliceable, and has a perfect springy texture without any gluten or wheat! Perfect straight from the oven, toasted or grilled. You will be amazed that an all-purpose gluten-free bread can taste so amazing!
A little about this recipe
Since going gluten-free, we’ve had many different bread recipes we swore by for brief periods of time. Some were homemade and some were store-bought. But none have been exactly perfect. The homemade recipes were either too unreliable or way too complicated to make on a regular basis. Some just used ingredients that were hard to find and I didn’t always have available. The problems with store-bought bread were vast. Some just didn’t taste great unless toasted and eaten with lots of toppings. Others tasted fine, but were full of processed ingredients and were far from “healthy and nourishing”. And lastly, when we did find a delicious and truly healthy gluten-free bread, the price reflected just how rare it was. This bread was a fun treat, but too impractical to buy regularly, especially considering how much toast my kids like to eat.
Considering all these things, it’s no wonder this bread recipe felt like a true miracle. First, it is just as easy to make it by hand as it is to throw in a bread machine. ( I do prefer making it by hand, and I'll explain that a bit in the recipe). Next, the ingredients are all readily available and affordable in most grocery stores. Plus, it’s a healthy, non-processed, absolutely amazing-tasting bread. It tastes identical to a honey whole-wheat bread, without any of the wheat. Its texture is fluffy and bouncy with a wonderful springiness that is rarely found in gluten-free bread.
As for the flour blend, the main ingredient here is sprouted oat flour. The oat flour is what really makes this bread so perfect. It has a natural sweetness and delicious flavor so there’s no need to add a ton of extra sugar. It has much more flavor than bread made primarily of rice flour, which has little flavor or nutrients on its own. Plus sprouted oats are much more nutritionally dense than rice and starch flours alone making this a filling and healthy bread. We grind our own in a grain mill, and it makes a really nice, fine oat flour. You can use store-bought oat flour, but they tend to be expensive. But if you're not looking to invest in a grain mill (ours attaches to our Kitchen-Aid stand mixer and is super easy to use) then just toss some old-fashioned oats in a blender and boom: oat flour. If you're blending your own oats make sure you start with traditional, not quick cook, oats. And if you can find sprouted oat, even better! We love One Degree Organics Sprouted Oats. Also, keep in mind this flour will be courser and your bread may be a little denser, but this should not be an issue. It will actually give it a lovely rustic touch!
I could talk about this bread all day long, but honestly, it speaks for itself. So grab your ingredients and get started! You’ll be amazed how quickly and easily this bread comes together. (Shopping tip: although most of these flours are easily found in most grocery stores, I prefer to buy them in bulk from Amazon so I can make this bread a few times a week without having to run to the store)
GREEN BEE GLUTEN FREE
Gluten-Free Honey Oat Bread
Equipment: Stand mixer with dough attachment
Ingredients
Instructions
Pre-heat your oven to 350°, then line a bread pan with parchment paper. (If your bread pan is non-stick you may not need to line it, but I prefer using a ceramic bread pan since non-stick coatings are full of unnecessary chemicals that we don’t want seeping into our bread. You could butter or oil the pan, but since the bread cooks for so long, the added oil may cause your crust to burn.
If making the bread without a bread machine (my preferred method) add all your wet ingredients (milk through honey) into the bowl of a stand mixer first. Next, dump your dry ingredients right on top of your wet ingredients in the bowl of your stand mixer and mix with a dough hook for 5-7 minutes. Stop and scrape down the sides of the bowl after the first minute to make sure all the dough is incorporated.
If using a bread machine, most recipes will tell you to simply add the dry ingredients, in order, on top of your wet ingredients. Newer bread machines have a gluten free bread setting, so at this point you would just turn it on and let it go. After a few failed attempts I do prefer skipping the bread machine. This way I can keep a better eye on the dough and make sure it mixes, rises, and sets up well before baking. Sometimes the machine will leave the dough lopsided after its final knead, and if you don’t check it, your bread will not bake evenly. Sometimes, the pre-set rise time on the machine just isn’t long enough and this will cause your bread to be too dense and possibly undercooked. Using a stand mixer and your oven allows you to keep an eye on the whole process, and honestly is not much more hands on time.
At this point, your oven should be nice and warm even if it’s still pre-heating. Either way, go ahead and turn it off, this is where our bread will rise.
Place dough into your bread pan and try to smooth it down with a spatula. It may be easiest to wet your fingers slightly and use them to even out and smooth the top of the bread. Keep in mind, this will not feel like traditional bread dough. It will be very sticky, and won’t “knead” or stretch like you may expect. But this is totally normal!
Next, cover your bread with a thin towel, and place it in your warmed oven for an hour minimum to rise. I've let it rise for up to 2-3 hours with no issue. (If you live in a very warm climate, or your kitchen is particularly warm, you could let it rise on your counter. I have had a lot of luck using the oven since it is draft free, out of the way, and keeps my rise temperature consistent no matter what time of year I am making the bread.)
After an hour or so, the bread should have visibly risen and be nice and fluffy looking. Set it on top of your oven so it stays warm while your pre-heat the oven to 325°.
Bake bread for approximately 1 hour, but start checking it for doneness 50 minutes. Your bread is done when the top is a nice golden brown color and it sounds nice and hollow when you tap it.
When the bread is fully cooked, transfer it out of the pan and onto a wire rack to cool. (If you used parchment paper, this step is super easy, the paper won’t be hot, and you can easily pull it out of the pan). As hard as it will be, you should let the bread cool before slicing.
Brittany’s notes
Like most fresh breads, this bread certainly tastes best the day it is cooked. We usually leave it in a non-air tight container on the counter for the first day or two, and after that transfer it to the fridge. If your family doesn’t eat the entire loaf while crowded around the counter waving bread knives full of butter like crazy people, then this bread should keep for around 4-5 days in the refrigerator.
You can absolutely make the dough a day before you want to bake it and let it rise overnight in the fridge. It won't visibly rise in the cold too much, so you'll want to let it rise in a warm place for about 30 minutes before cooking to make sure it is warmed through before it goes in the oven.
I realized the recipe calls for two separate types of starch. And I'm sure you could mess around with the ratios to only have to use one. But potato starch is denser then tapioca, and both have different thickening abilities. I've never attempted to sub one for the other, because honestly I don't want to mess with a perfect thing. But I'm sure its possible.